Kohera3D Software Tutorials
1. Quick Start Tutorial
3 minute quick start tutorial. Adding scans, fitting pipe, and creating a mesh.
Watch 3 Minute Quick Start Tutorial
→ See also Online Documentation
2. Kohera3D User Interface
Start here to get familiar with Kohera3D Viewer user interface before moving to the pro module tutorials below.
Kohera3D Viewer
3. Kohera3D Software Modules
Pro module tutorials.
Kohera3D Piping – Fit Piping to Scan Data
Kohera3D Mesh – Meshing Scan Data
Kohera3D Spectrum – Creating Point Groups
How to Convert and Filter 3D Laser Scans
Point Cloud Converter software is included with any Kohera3D subscription module.
Point Cloud Converter
Additional How To Videos
How to clean and remove unwanted points from 3D laser scans
How to view Cyclone registration constraints with Kohera3D
5 techniques for getting quality results from your laser scans
FAQs and Troubleshooting
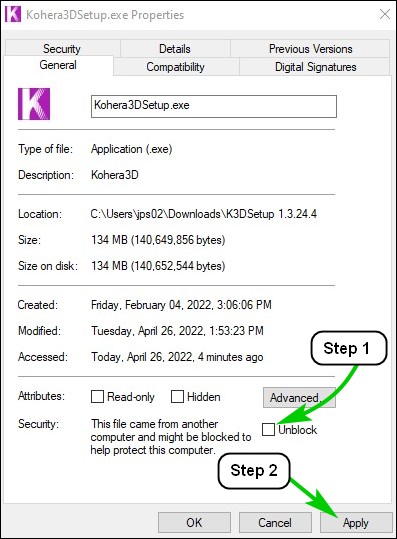
Issue: Windows Defender Smart Screen is blocking the app from installing.
Solution 1: Right click on the Kohera3D file and choose Properties from the menu. Check the "Unblock" check box in the lower right corner and click the "Apply" button. Open the Kohera3D installer once again.
Solution 2: On the "Windows protected your PC" screen, click the "More info" link. After doing so a"Run anyway" button should appear. Click this button. If a "Run anyway" button does not appear, use Solution 1 above instead.
Issue: User cannot fit pipe to scan data. A "piping system must be created" message appears.
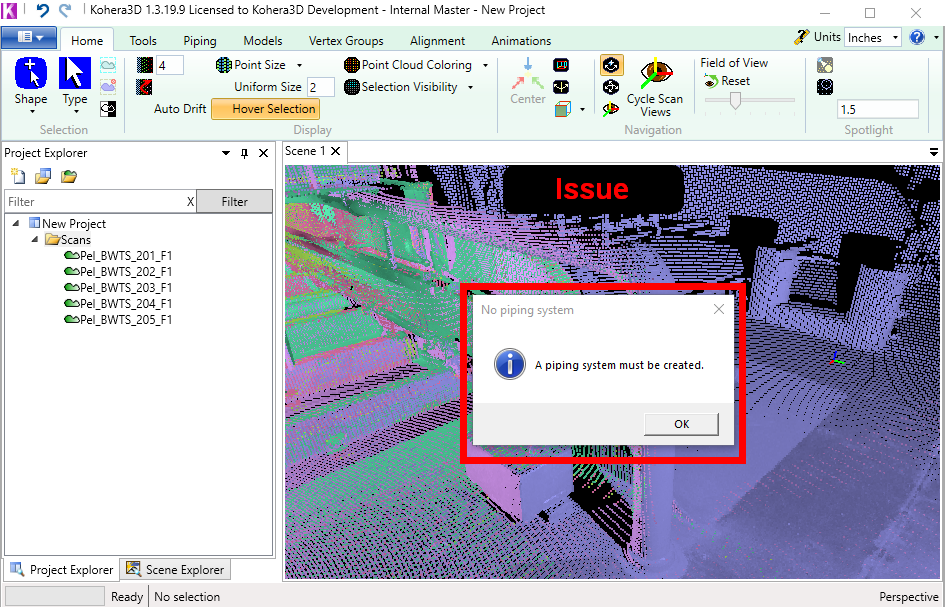
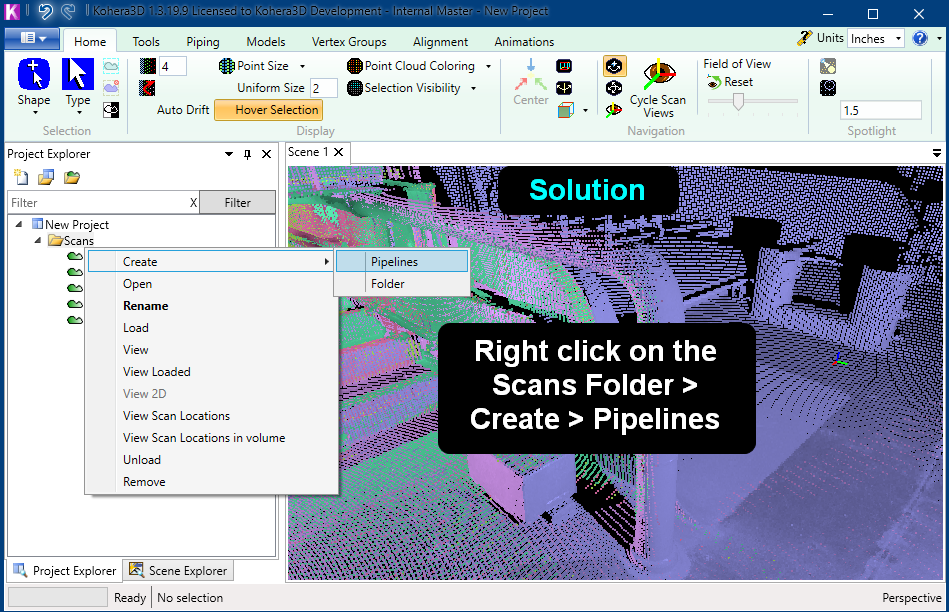
Solution: Right mouse click on the Scans folder and choose Create>Pipelines. You may also create a New Folder and add a Pipelines System to the new folder using Create>Folder then Create>Pipelines.
Issue: Can't create a mesh.
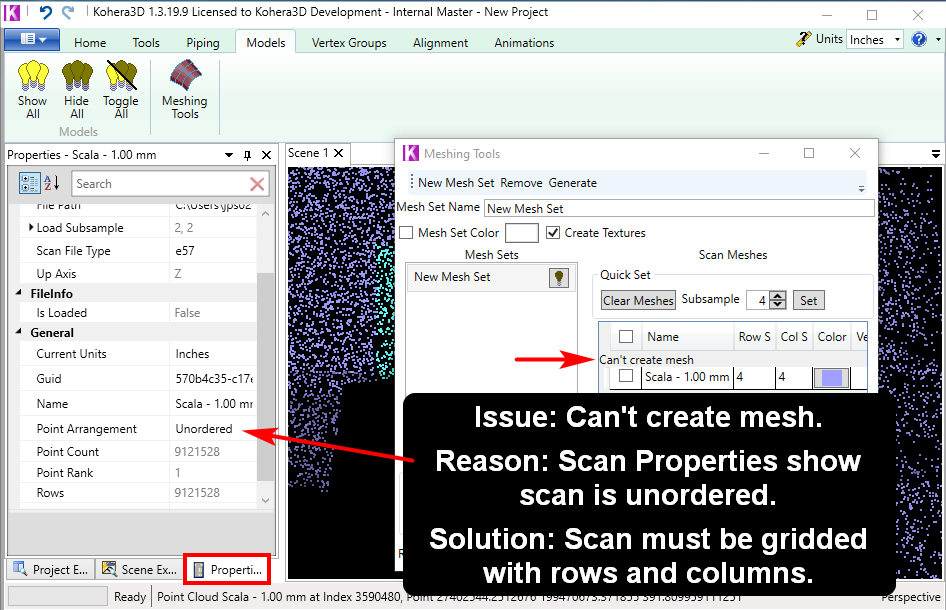
Reason 1: Scan has unordered data.
Solution 1: Use a scan that has a grid using rows and columns. This may require going back to the initial program where you exported your data, and export it a second time, but with the option of rows and columns, grid, or ordered data checked on.
Reason 2: No scan points have been selected using the Shape tools.
Solution 2: Locate the Shape tools on the top left under the Home tab. Draw a selection around a set of points, then proceed to create a New Mesh Set.
Issue: Can't clear a selection or the Clear Selection button is grayed out.
![]()
Solution: Switch the shape tool to one of the selection tools with the word "select" in the name. Doing so will enable the Clear Selection button.
![]()
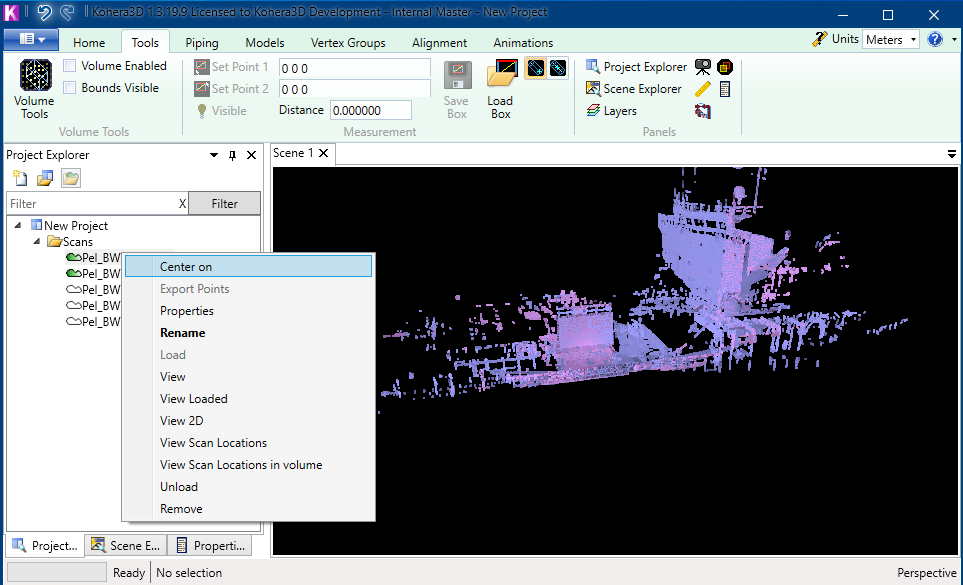
Issue: After adding a scan to the Scene window, the scan doesn't appear or the Scene window remains black.
Reason: Scan may be far away from the 0,0,0 origin.
Solution: In the Project Explorer palette, right mouse click on the scan and click Center on.
Need Help?
Send us your question or tell us about the issue you’re having.
General Inquiry Contact Support