User Tools
Sidebar
Table of Contents
Kohera3D Rhino Plugin
Kohera3D Plugin for Rhino 7 and 8 creates nurbs surfaces from point clouds.
Install the Plugin
1. Open Rhino and drag and drop the ![]() Kohera3DRhino.rhi file onto one of the Rhino viewports. Follow the prompts to install the Rhino plug-in.
Kohera3DRhino.rhi file onto one of the Rhino viewports. Follow the prompts to install the Rhino plug-in.
Create the Communication Bridge
![]() Important Note: The connection steps below must be done each time you open a new session of Rhino7/8 and Kohera3D.
Important Note: The connection steps below must be done each time you open a new session of Rhino7/8 and Kohera3D.
Option 1
1. Open Rhino3D and open Kohera3D so that both programs are open and ready to use.
2. Under the Models tab > Rhino3D Bridge, click the  Enable Rhino3D Connection button.
The circle in the title bar should turn from Red to Yellow.


3. In the Rhino Command bar, type ConnectToKohera3D. This will allow the two programs to speak to one another.
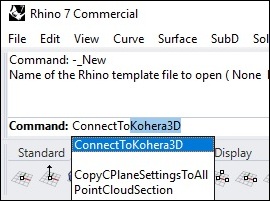
You will know the connection is successful if the connection icon in Kohera3D turns Green.

Option 2
1. Open Rhino3D and open Kohera3D so that both programs are open and ready to use.
2. Click the Red circle near the top left of the program.

3. Press the Start Connection Server button followed by the Accept button.
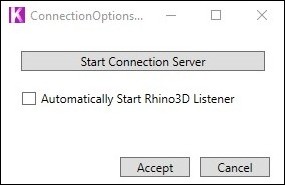
The Red circle in step 2 should now turn into a Yellow circle.

4. In the Rhino Command bar, type ConnectToKohera3D. This will allow the two programs to speak to one another.

You will know the connection is successful if the connection icon in Kohera3D turns Green.

Surface Creation from Scan Data
1. Using one of the Area Selection Tools, make a selection of scan points.
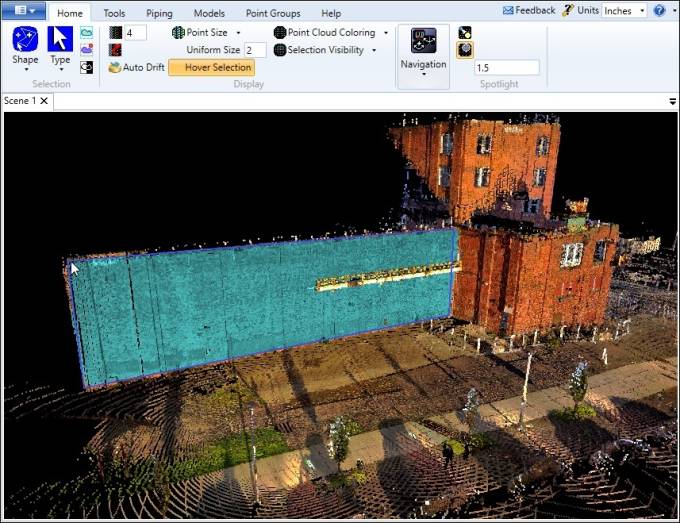
2. Under the Models Tab > Rhino3D Bridge click ![]() Create Surface.
Create Surface.
The Surface Parameters window shown below will appear.
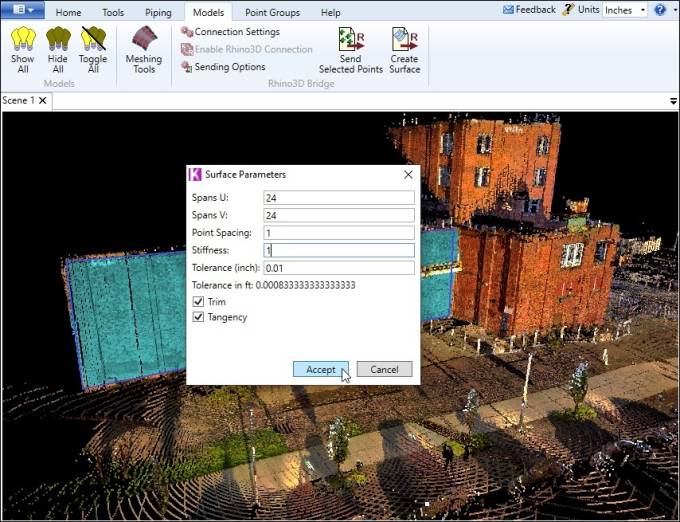
3. Make adjustments to the parameters and click Accept.
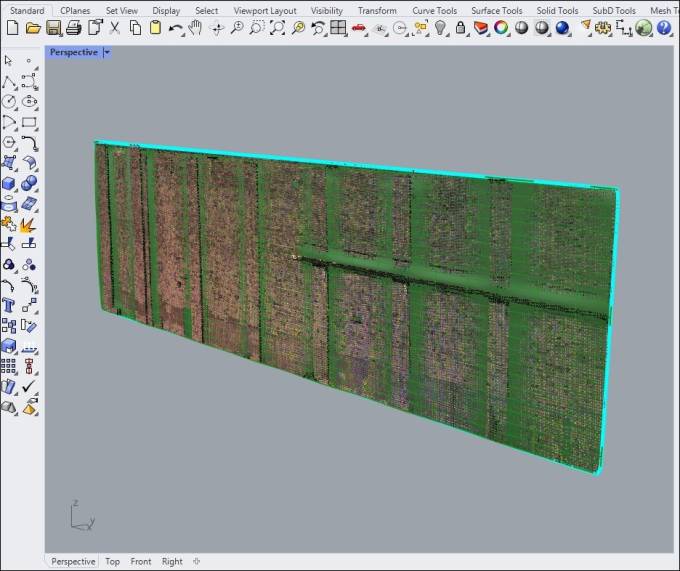
4. View the results in Rhino. Repeat Surface Creation steps and make Surface Parameter adjustments to change the results if needed.
Surface Parameters
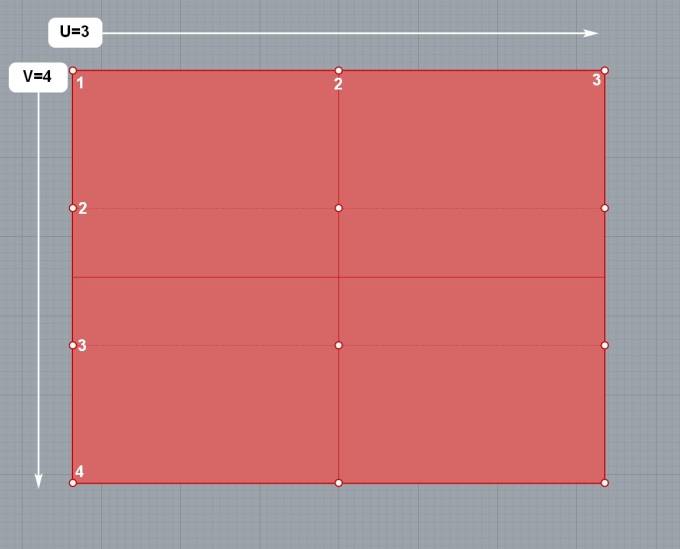
Spans U and Spans V
This is the directional span count for the automatically generated surface. Use higher numbers for curved surfaces and smaller numbers for planar surfaces. The example below uses Spans U=3 and Spans V=4.
Point Spacing
The distance to use between point cloud points.
Stiffness
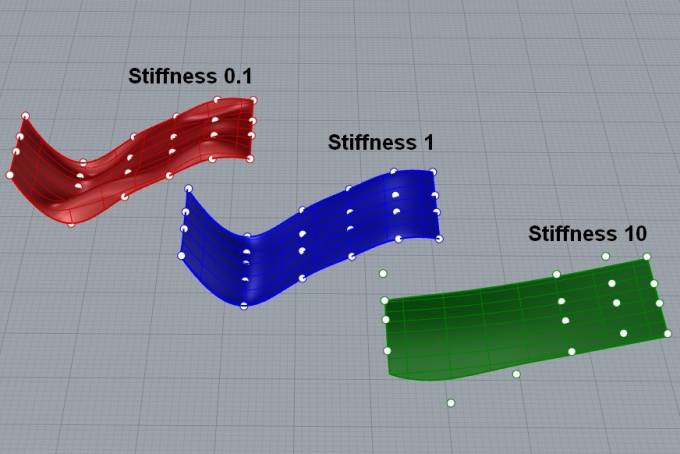
This setting tells the surface how much to deform or deviate from the sampled points in your point cloud. Smaller numbers may have more flex and deformation between points, while a larger number will generally be stiffer and thus more rectangular. A setting of 1 usually does a good job of following the scan points in the point cloud, however this will vary as it is dependent on the shape, size, and complexity of the scanned area you're wanting to surface.
Tolerance
If a surface doesn't properly trim, try lowering this value. Decimals are allowed.
Trim
Trims surface edges to the generated curves. It is recommended to leave this Checked On.
Tangency
Make surface edges tangent to the generated curves. It is recommended to leave this Checked On.
